Engineer Program
Program upgrade skill di bidang engineering, dari dasar hingga mahir.


Spesial Program
Program khusus melalui platform mitra resmi dokter mekanik academy seperti Udemy, Prakerja, dan Kampus Merdeka.
Program upgrade skill di bidang engineering, dari dasar hingga mahir.
Program khusus melalui platform mitra resmi dokter mekanik academy seperti Udemy, Prakerja, dan Kampus Merdeka.
Sertifikasi BNSP
Pilih pelatihan dan sertifikasi Nasional BNSP di bidang engineering, rekayasa, manufaktur, dan subsetnya
Lihat SemuaSertifikasi Internasional
Pilih pelatihan dan sertifikasi Internasional di bidang engineering, rekayasa, manufaktur, dan subsetnya
Lihat Semua
Temukan inspirasi dari hasil karya dan pengalaman para alumni dr. Mekanik Academy.

dr. Mekanik Academy tersedia di berbagai platform mitra resmi untuk memudahkan akses pelatihan Anda.

Jelajahi produk dan layanan lainnya dari ekosistem dr. Mekanik untuk solusi bisnis yang komprehensif.
dari dr. Mekanik Academy
Membantu kamu belajar, berkarya, dan bikin projek engineer dengan instan dan presisi!
Kumpulin Token Bareng AI Assistant dr. Mekanik!
Semakin aktif, semakin banyak token yang bisa kamu dapat!
Implementing MQTT on an ESP32 with an HC-SR04 ultrasonic sensor and A servo motor involves creating A setup where the sensor measures distance and the ESP32 sends that data to an MQTT broker. The servo motor can be controlled remotely using MQTT commands.
Implementing MQTT on an ESP32 with an HC-SR04 ultrasonic sensor and A servo motor involves creating A setup where the sensor measures distance and the ESP32 sends that data to an MQTT broker. The servo motor can be controlled remotely using MQTT commands. General outline of the steps :
1. Setup MQTT Broker :First, We need an MQTT broker. We can use a cloud-based broker using broker.hivemq.com. The broker acts as a communication hub between the ESP32 and any other devices We want to connect.
2. Install Required Libraries :We'll need to install the necessary libraries for the HC-SR04 sensor, servo motor, and MQTT. For the sensor, We might use the Servo library ESP32Servo. For MQTT, We can use the PubSubClient library.
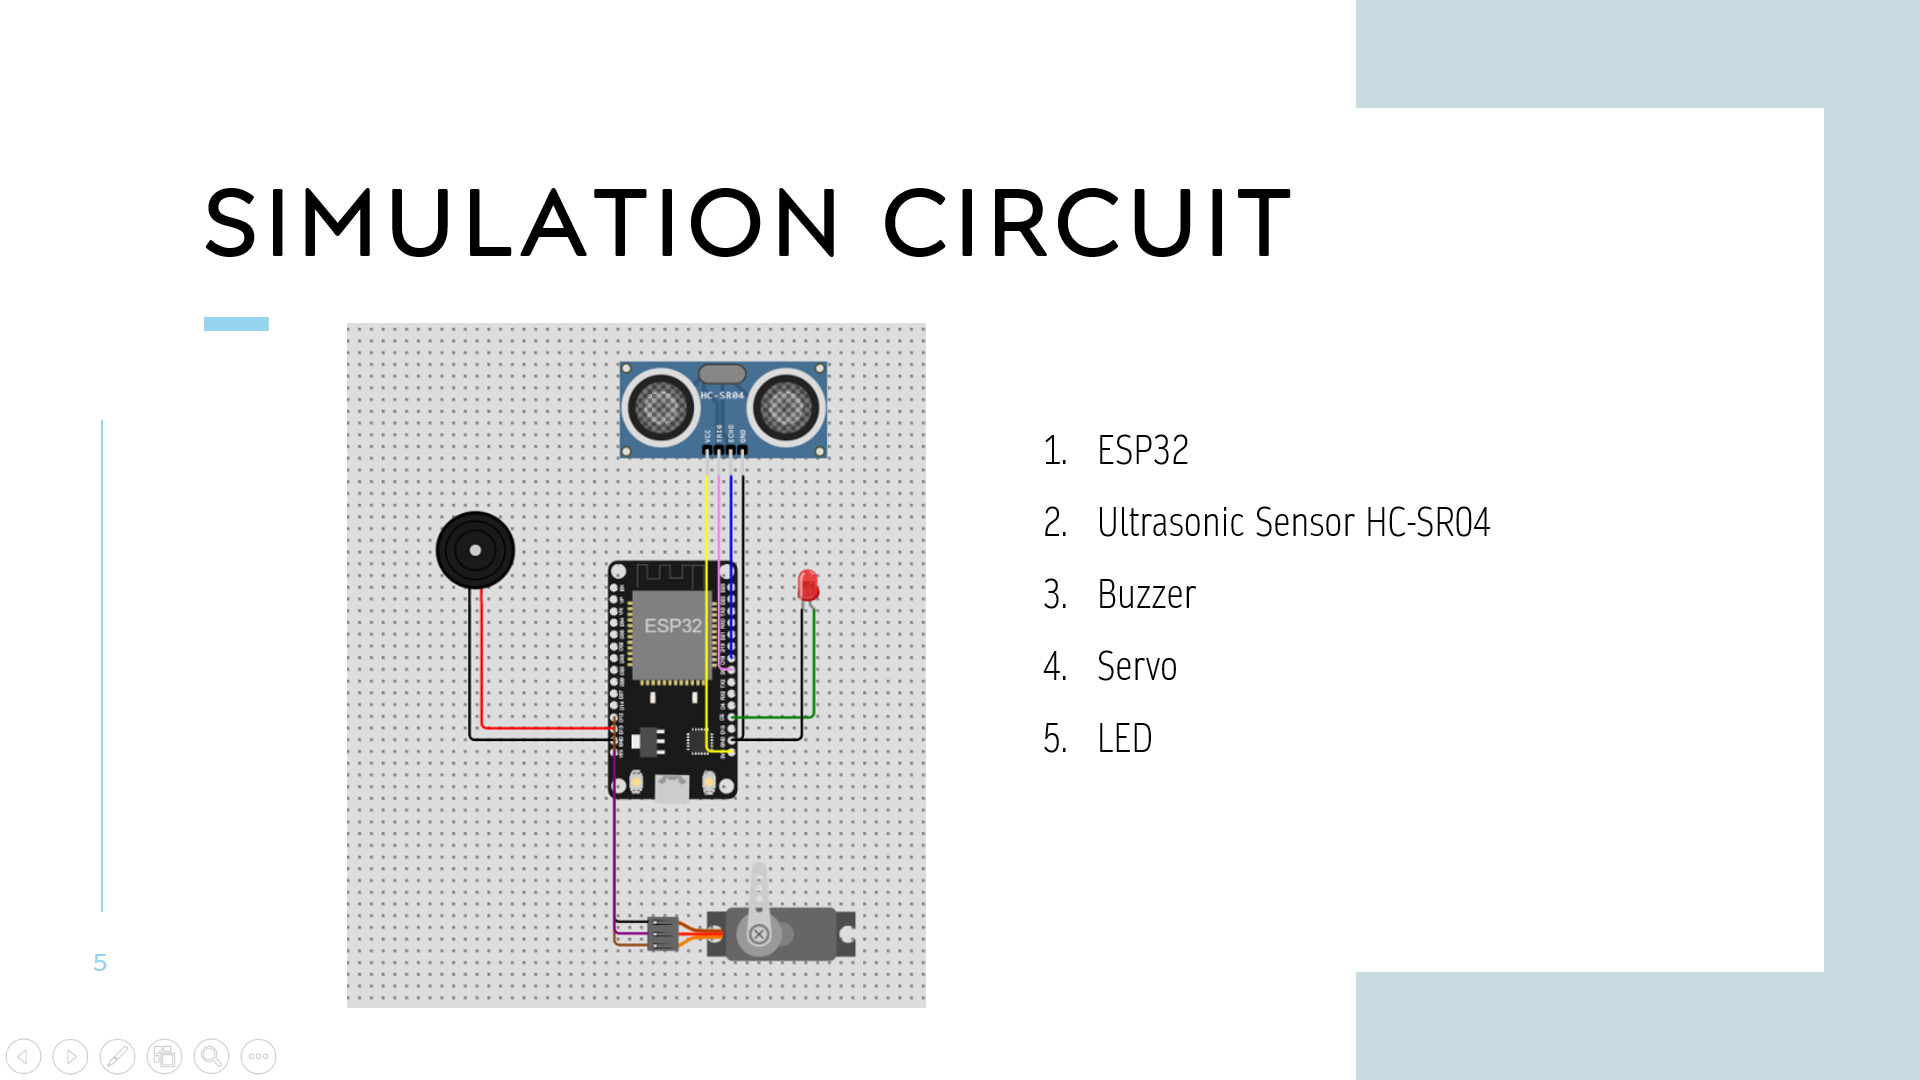
3. Connect Hardware (Using Simulator in wokwi.com) : Connect the HC-SR04 sensor to the appropriate GPIO pins on the ESP32 (trigger and echo pins). Connect the servo motor to a GPIO pin capable of PWM control. WiFi Connection: Set up the ESP32 to connect to Wer WiFi network using the appropriate credentials.
4. MQTT Configuration :Configure the MQTT settings in ESP32. Define the topic.
5. Measure Distance : Use the HC-SR04 sensor library to measure the distance. Convert the sensor data into a meaningful format.
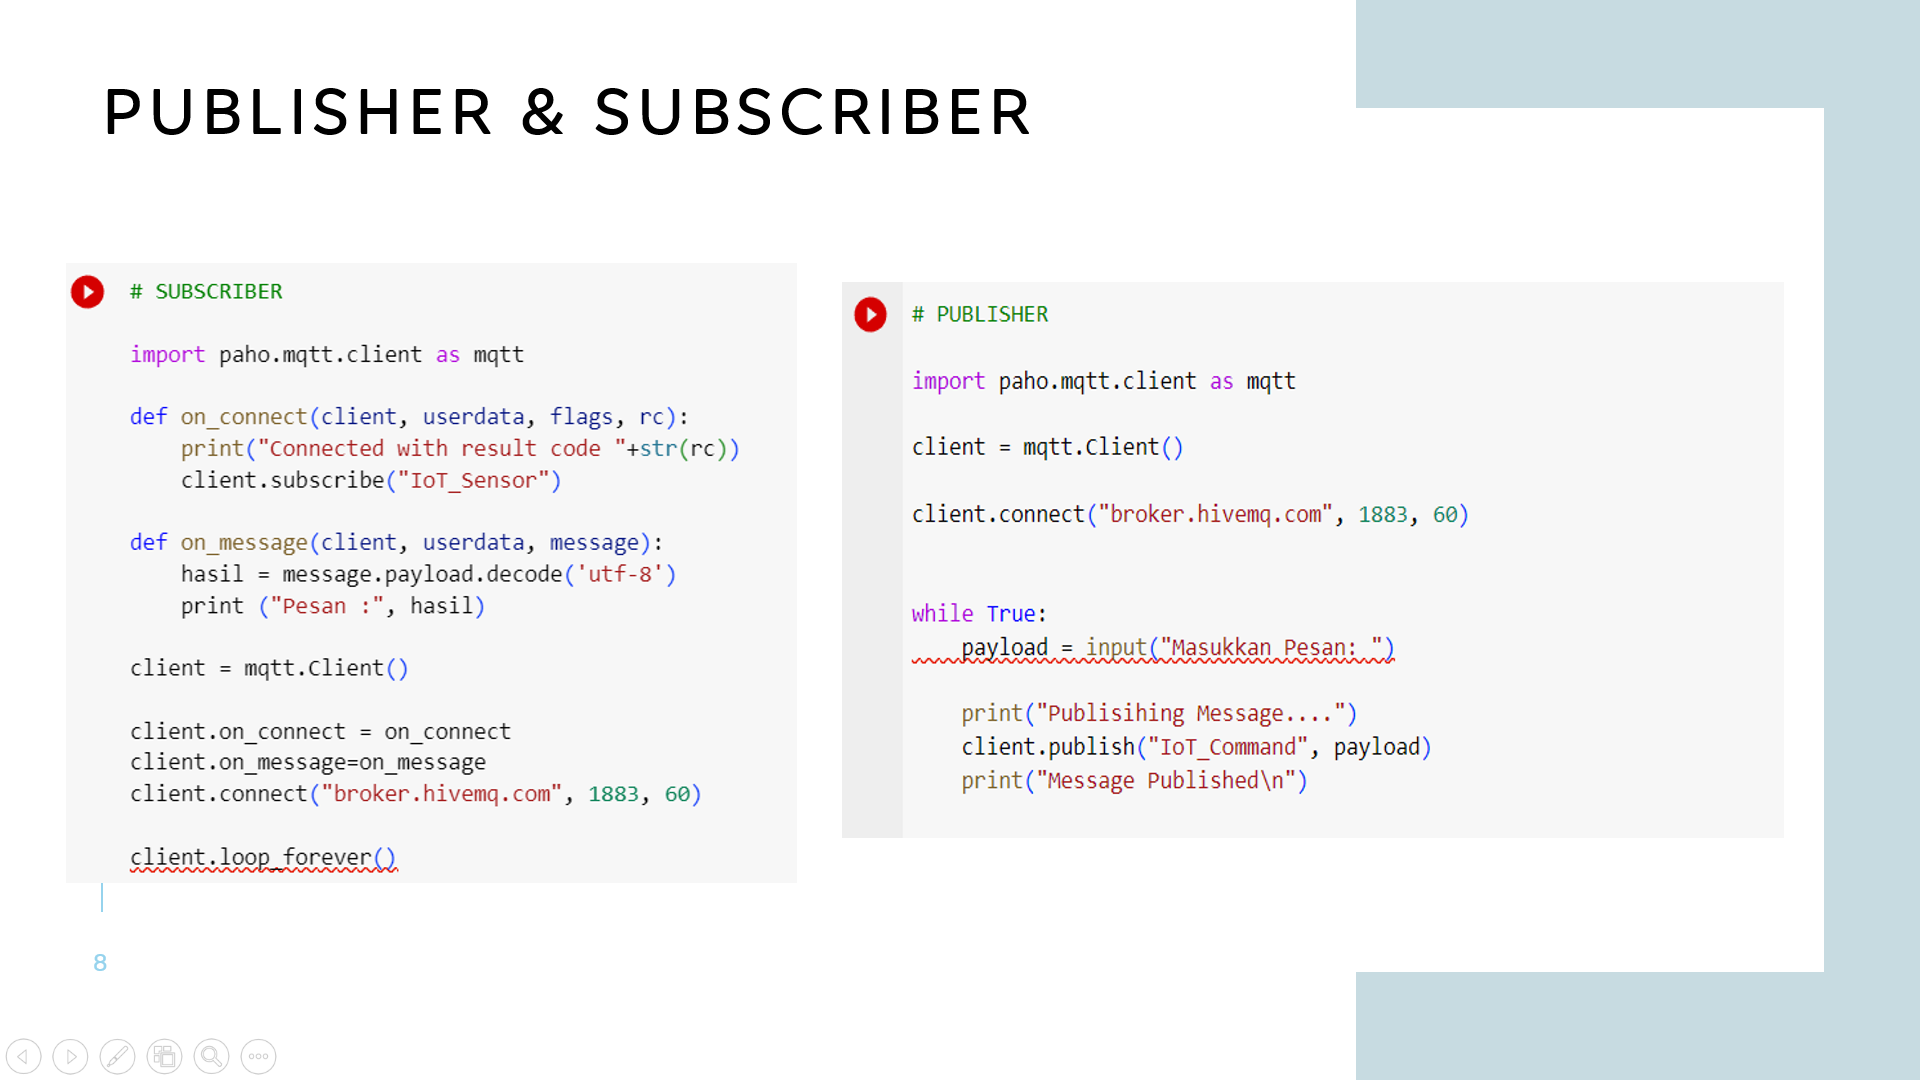
6. MQTT Publisher and Subscriber : install paho-mqtt in Google Coolabs. Configure as # SUBSCRIBER and # Publisher. Set according with the topic.
7. Subscribe to Control Topic : Subscribe to an MQTT topic that will be used to control the servo motor, LED and buzzer
8. Servo Control :When We receive MQTT messages on the control topic, interpret them as servo motor control commands. Use the Servo library to move the servo motor accordingly.
9. Loop Logic : In the loop() function, periodically measure the distance and publish it to the MQTT topic.